Customer Support System Testing
To test the "Customer Support" system, it is necessary to verify that all requirements are functioning correctly according to the following steps:
Open a New Support Ticket by the End User
- Click on "Customer Support System" in the sidebar.
- Navigate to the "Request Ticket" view from the sidebar.
- Click on the "+" sign to request a new ticket or click on the Add Ticket button.
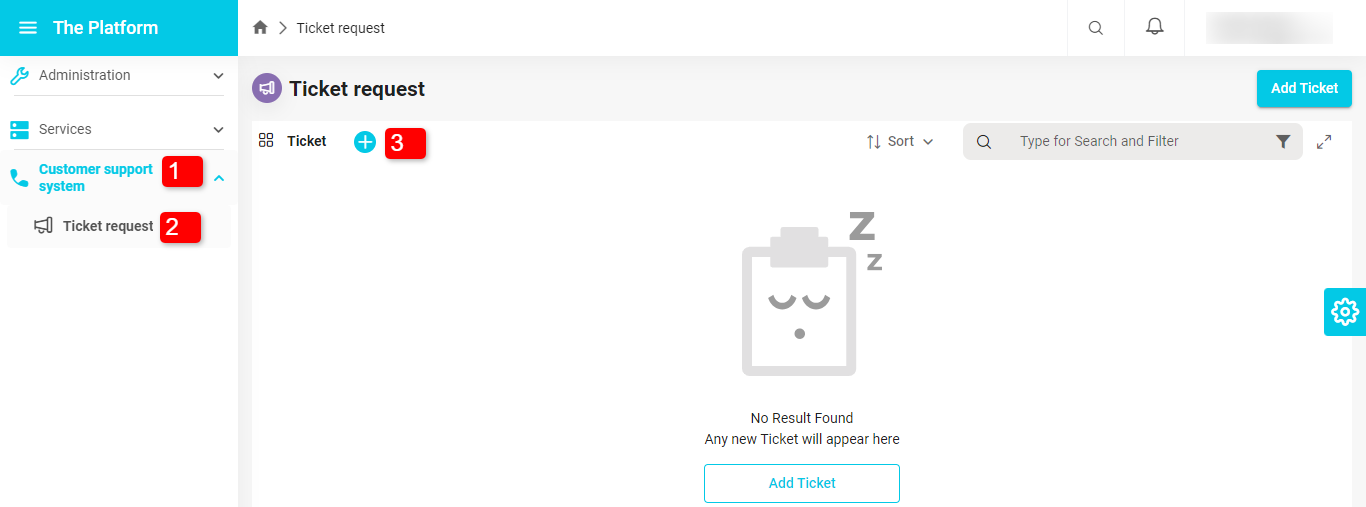
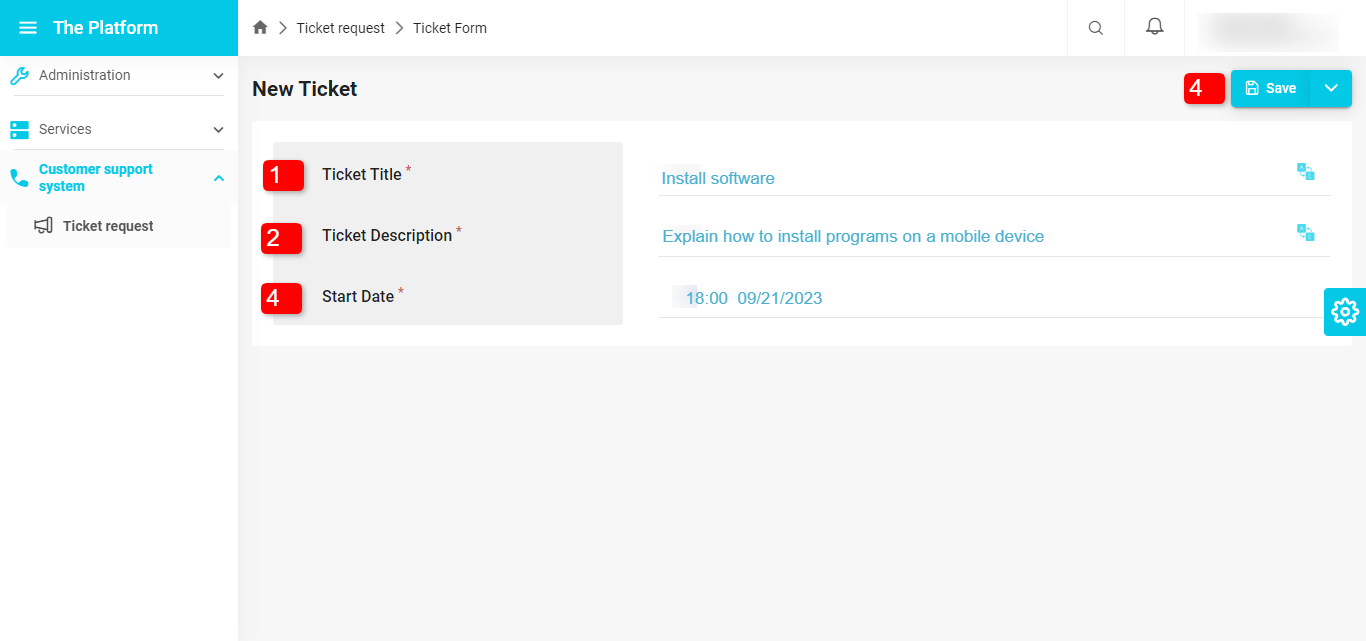
- The ticket information page appears.
- Fill in the ticket information.
- Ticket Title: "Software Installation".
- Ticket Description: "Explanation on how to install software on the mobile device".
- Enter the ticket opening date.
- Click the "Save" button.
- A popup appears to confirm the request saving.
- Click "Save Changes".
- The "Information Details" page you entered appears, with the "Workflow" on the left.
- Click the "Submit Request" button to send the request to the support desk.
- A popup appears to confirm the request submission, where you can add a comment or note to the support desk.
- Click "Submit Request" to confirm the submission.
- The request moves to the support desk for the next step.
-11a01b704b6fa4aff27031587419ca4c.png)
-fb2e13fab6c83033f0fad942c2931934.png)
Follow-up by the Support Desk on the Ticket
A "New Ticket Arrival" notification is sent to the responsible employee in the support desk.
-4861b923963025c3a68204bafd56bc5c.png)
Clicking the notification takes you to the ticket details.
Click the "Take Ownership" button to transfer ownership of the step to this employee.
A popup appears to confirm the ownership take.
Click Confirm.
-5f91908b3555583344dea493b58ab447.png)
Click the "v" sign next to the "Approve" button.
Several options appear, including "Edit Ticket", click on it.
-08f525c38dd5e732a21f0ff25a2e39ea.png)
The ticket information appears, and you can edit the "Assignee" field and the status field to "In Progress".
Assign the ticket to the support representative "First Employee".
Click the "Save" button, and a popup appears to confirm the changes.
-20f9d89f36eef78825e212a45523e308.png)
Click the "Send for Processing" button mentioned earlier to send the request to the assigned employee.
A popup appears confirming the request approval, click "Approve".
-bc151f4a0b6d051afc64c2c76cabc8d9.png)
Ticket Processing by the Support Representative
- A notification is sent to the employee responsible for solving the request that the ticket has been assigned to them.
-6b5139e5e6a6e2bd451c5496f917ae06.png)
- Access the incoming requests through the sidebar.
- Click on the Tickets window.
- Click on view or click on the ticket.
- View the ticket details.
- Click the "v" sign next to the "Review Solution" button, and several options appear.
- Click Edit Ticket.
- Enter the ticket solution.
- Save and confirm the changes.
- Click "Review Solution".
-a5733da0e2641a34466e9651d965beb8.png)
- The step moves to the support desk for solution review.
- A notification is sent to the employee responsible for solving the request that the ticket has been assigned to them.
Solution Review by the Support Desk
- A notification is sent to the support desk for solution review.
-91dedba3273dffb99a9351954dd4b727.png)
- Access the ticket details.
- Review the solution by the support desk.
- Click Send Solution if manager approval is not needed.
- If manager approval is required, click on Manager Approval.
- The step moves to the manager for approval.
-9f099fa52903b1ec28b072156b78053b.png)
- A notification is sent to the manager for solution review.
-d2ba675f96941150ffb9962cb7f7cc9e.png)
- The manager can approve or reject the request.
- Click Approve.
-f603f21cbc35a2317ea43e09f13b5df2.png)
- The step moves back to the support desk.
- The support desk clicks on Send Solution.
-fe61ea6b2a91547ad3e0e52361929bcc.png)
- A notification is sent to the support desk for solution review.
Solution Evaluation
- A "Resolved" notification is sent to the employee who submitted the request.
-ab1213c87bb4757891b9b0de2e9c292e.png)
- Click the "v" sign, and several options appear; select "Edit Ticket".
- Evaluate the ticket and save the changes.
-eb16ba58564b687bd2f1a0aad7ad9e02.png)
- Click on Evaluate.
-d9b36236f433a7270eca22aae93b44d6.png)
- A "Resolved" notification is sent to the employee who submitted the request.
Close the Ticket
- A notification is sent to the support desk.
-e418c671227af2d3ca427d283d50bdd8.png)
- The support desk clicks on the Close Ticket option to close it.
- A notification is sent to the support desk.
View Support Ticket Statistics
- View the dashboard for tickets.
- Access the "Customer Support System" in the sidebar.
- Access the "Incoming Requests" view in the sidebar.
- The "Dashboard" window appears automatically.
-520e96f614a39abe2f39ae9b8efcd08e.png)